Unlock the Secret to Effortless Data Import: How to Use Power Query to Clean and Transform External Data Before Loading into Dataverse
Introduction: Meet Power Query - Your Data’s New Best Friend
You know how sometimes you invite a friend over, and they show up with a giant bag of random stuff, half of which you’ll never use? Well, that’s what external data can be like. It's all over the place – messy, incomplete, and generally not ready for action. But, just like that friend who shows up with an oddly specific item you didn't know you needed (like a pizza cutter shaped like Darth Vader), Power Query is here to clean up that mess and turn it into something beautiful.
In this blog post, I’ll walk you through how to use Power Query to clean, transform, and load your data into Dataverse like a pro. Don't worry – we’re going to have fun while we’re at it! Power Query is one of those tools that’s surprisingly powerful, like the unassuming hero in every superhero movie. So, let’s get started!
What is Power Query, Anyway? (Hint: It’s Not a Superhero, But It Should Be)
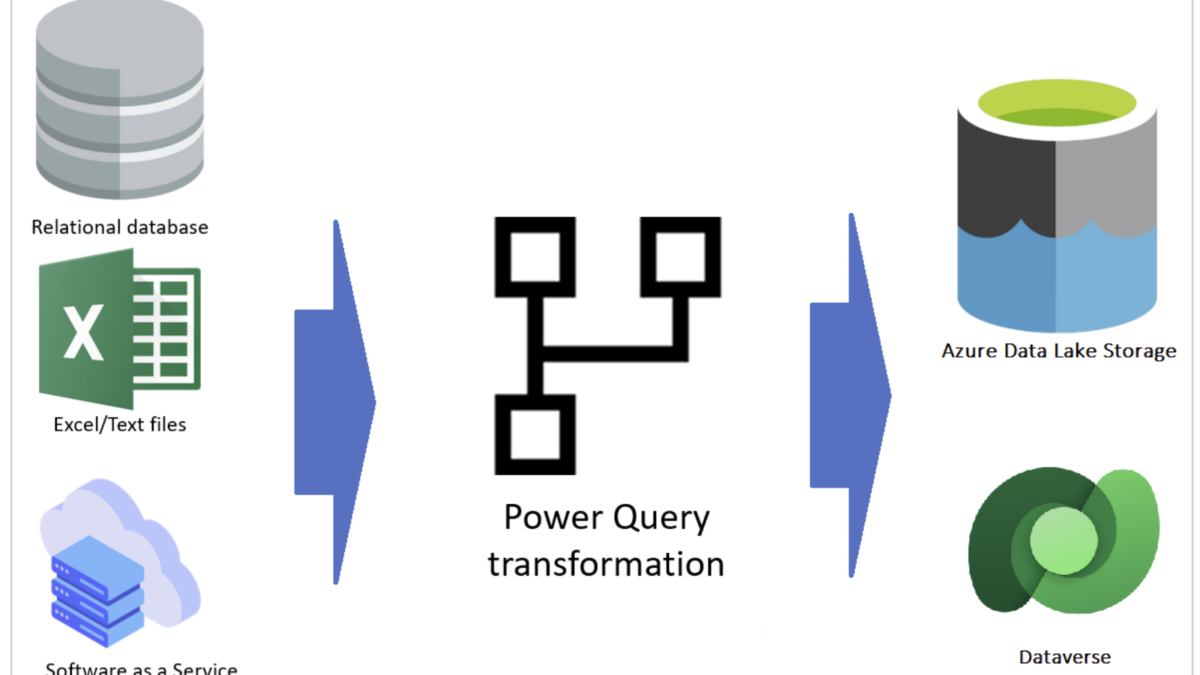
If you're new to Power Query, let’s break it down. Think of Power Query as a kitchen gadget that helps you prepare your ingredients (data) before you cook up something delicious in the Dataverse pot. It’s a tool in Microsoft Power BI and Excel, and it helps you clean, transform, and reshape data before it gets dumped into the database (Dataverse, in this case). No more nasty, raw data — just a refined, ready-to-use feast.
Here’s how you can think of it:
- External data = The random ingredients.
- Power Query = The super-efficient, slightly obsessive chef who chops, dices, and makes everything look just right.
- Dataverse = The beautiful dish that’s finally ready to serve your app
Now that we’ve cleared that up, let’s dig into how to actually use Power Query to transform your data before it reaches Dataverse.
I'll show you how to add more products to your Product Details entity in Dataverse using Power Query. If you're wondering what an Entity is, it's basically a table within the Power Platform Ecosystem – think of it like a structured place to store your data. Now, imagine you already have a Product Details entity in Dataverse, and it's filled with some product names, but the list is incomplete. You've got a long list of additional product names sitting in an Excel file, and instead of manually typing each one into Dataverse, you want to import the data quickly and easily. I’ll walk you through how to use Power Query to import that list of products from Excel and merge it seamlessly into your existing Product Details entity in Dataverse. Let’s get started and save you from that data entry nightmare!
Step 1
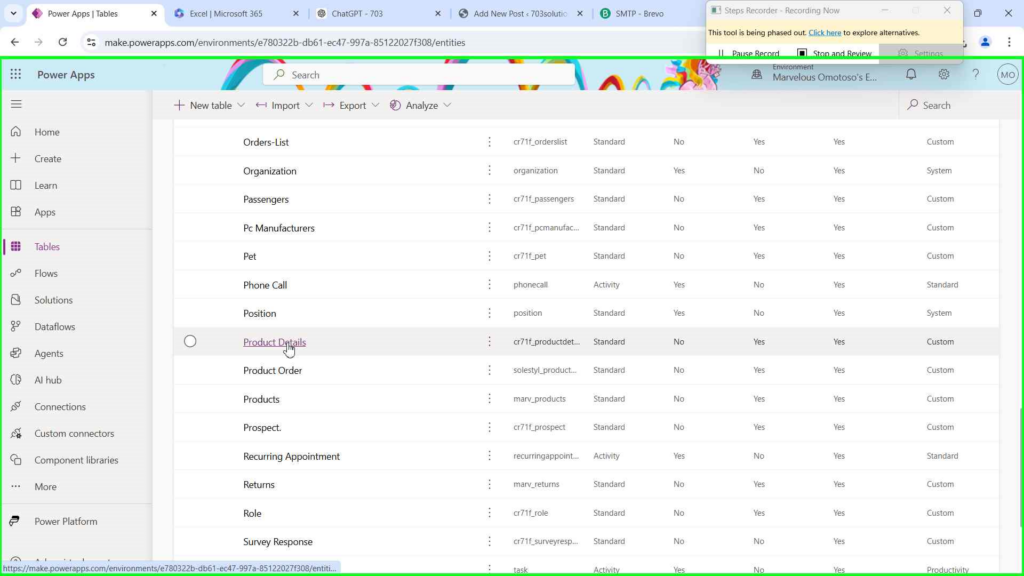
Log into make.powerapps.com, navigate to Tables to select the table you want to import new data into
Step 2
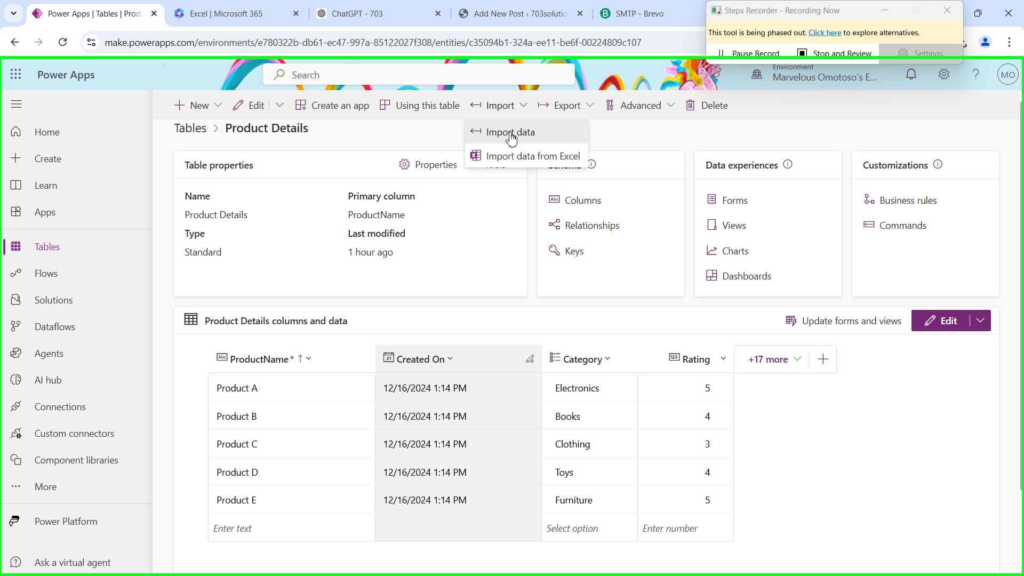
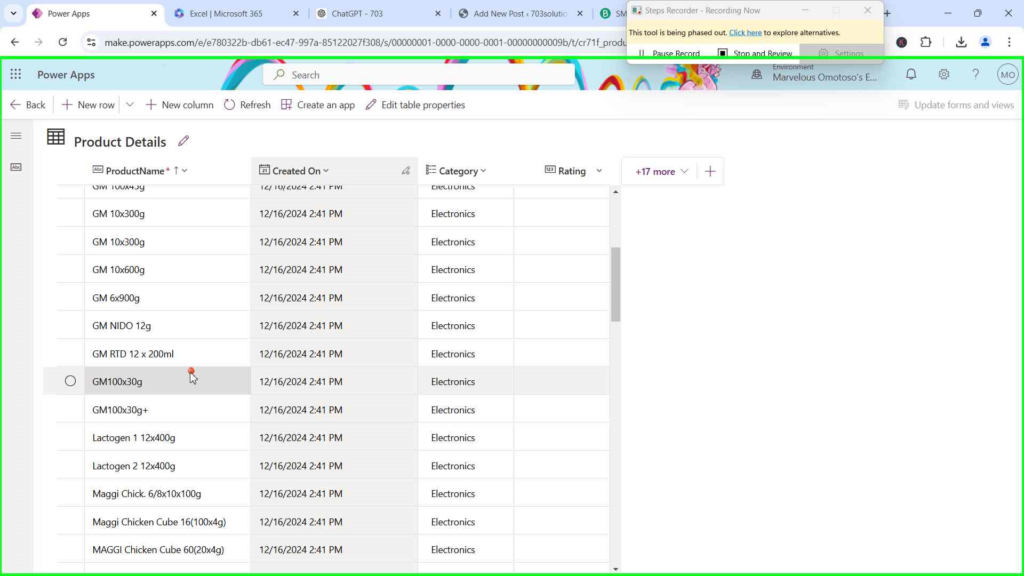
Once your table opens, go ahead and select Import Data on the top bar (see image below). This is your gateway to bringing in the extra products you need to complete the list. At this point, if you look at the table, you'll notice there are only five products listed. It’s like a pizza with only a few slices—definitely not enough to share with the whole team! Time to fill that table up with the full list of products you’ve got waiting in your Excel file. Let's add those missing pieces!
Step 3
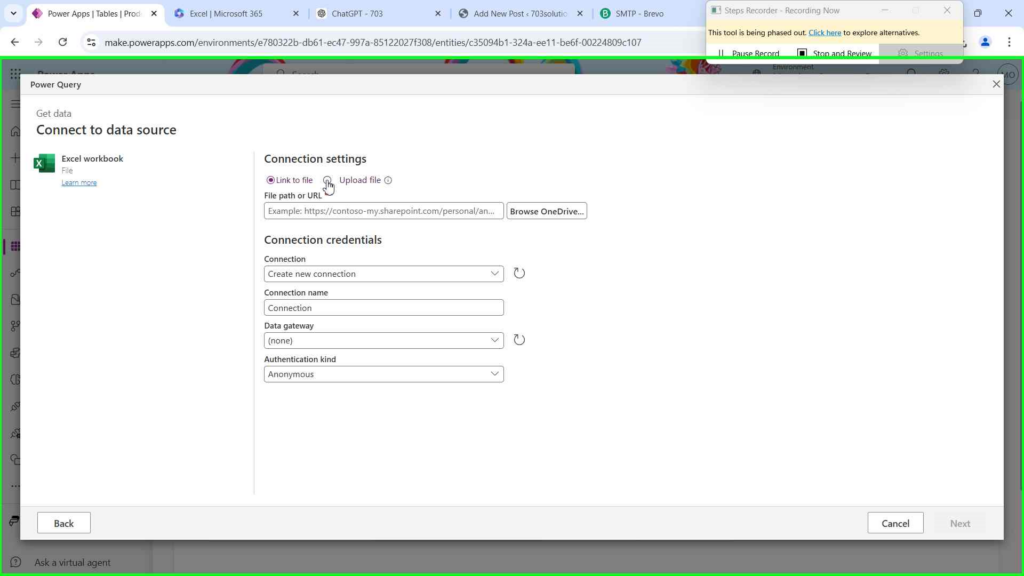
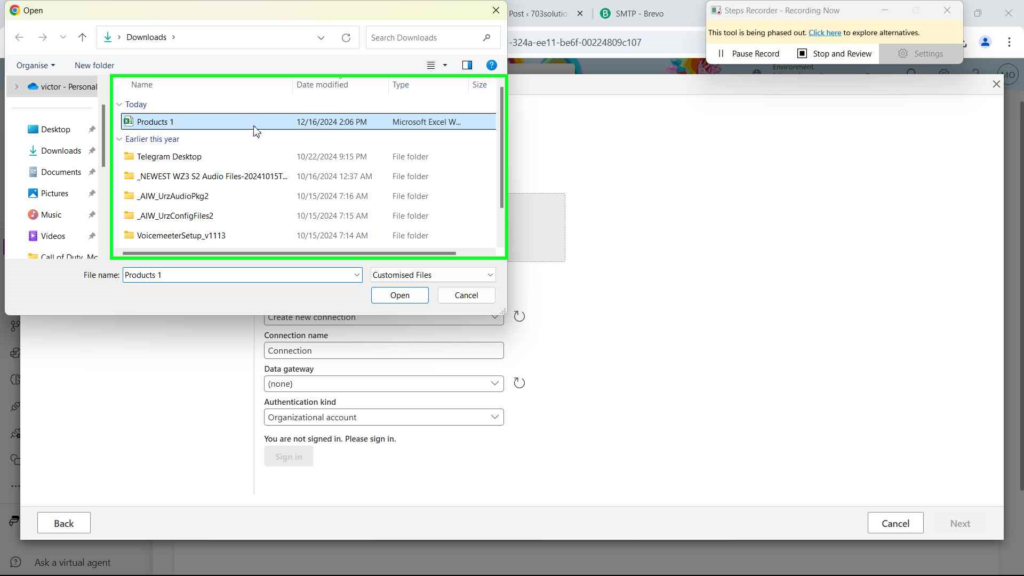
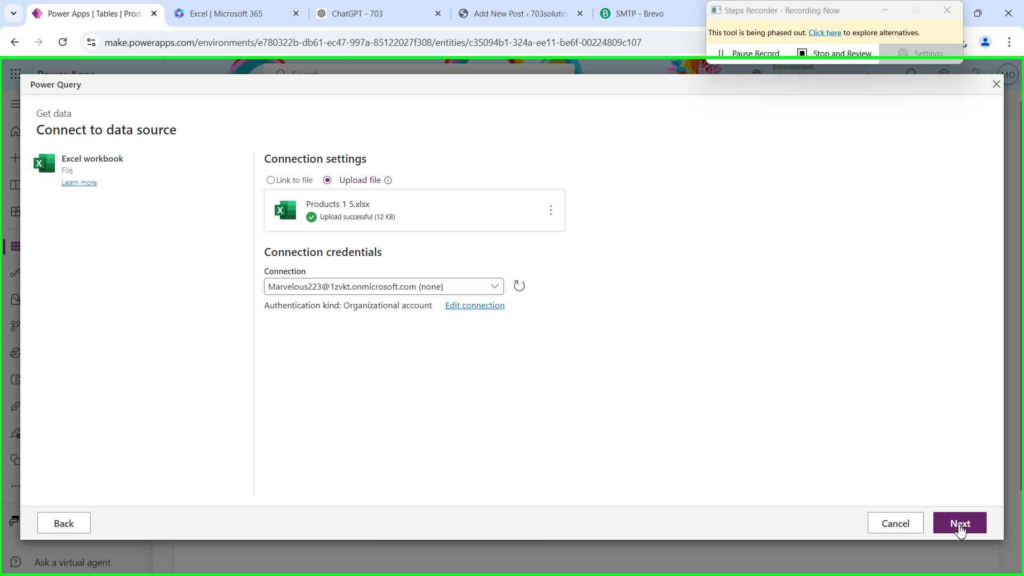
You’ll now be directed to Power Query, which is like the magical portal where you can connect to various external data sources. Whether your data is hiding in SharePoint, a SQL database, or even a web page, Power Query can help you bring it all together. However, we’re keeping things simple and just pulling our data from an Excel workbook. It’s like reaching into a file folder and pulling out exactly what you need. 🗂 Select Excel Workbook as your data source and locate the file containing the list of additional products. Don’t worry—Power Query will walk you through the process, and you won’t need a crystal ball to figure out what to do next! Let's move on to the fun part: cleaning and transforming that data.


Step 4
Once you've clicked Next, you'll be whisked away to the Power Query Editor – think of it like the workshop where your data gets a makeover. It's time to roll up your sleeves and turn that product list from "meh" to "wow!" before sending it over to Dataverse. Now, as you look at your data in the Power Query Editor, you’ll notice something important: the column header says Column1 instead of ProductName
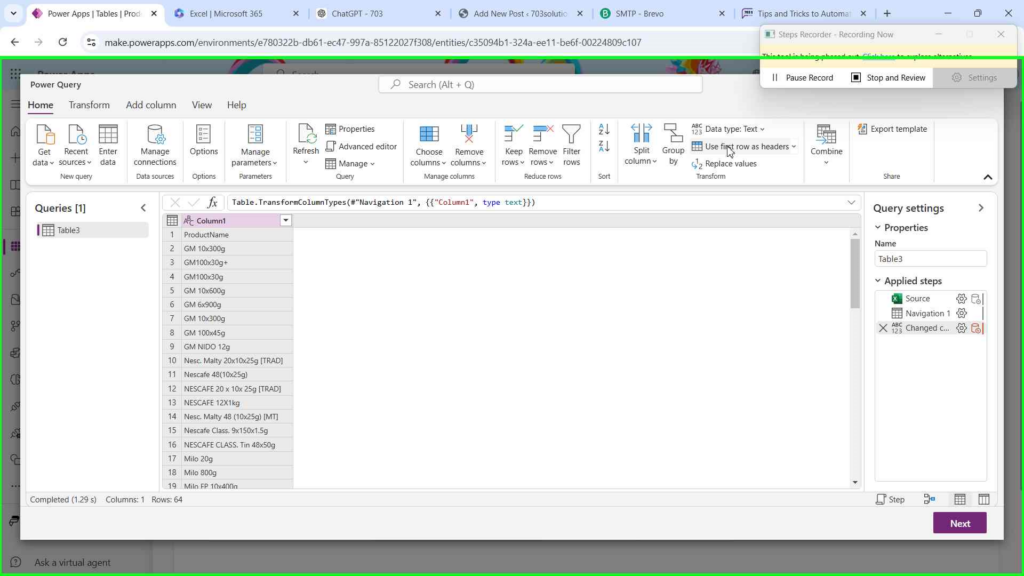
To fix that, you can simply click on Use First Row as Headers in the top left bar (just like in the picture above). This action tells Power Query to take the very first row of data and use it as your column headers, which means ProductName will jump right up as the header instead of the generic Column1. It’s like telling Power Query, “Hey, that first row is important! Let’s make it official!” 🎉 Once you do that, your column header will be much clearer, and your data will look more organized and ready for action. 📈
Now that your column headers are sorted, feel free to go ahead and transform your data in whatever way fits your needs. Whether you need to clean up the formatting or change data types, this is your time to shine. ✨
Important Things to Note:
Before you get too carried away, make sure your column names and data types match the ones in the Product Details table in Dataverse. This step is crucial because mismatched column names or data types can cause errors when you try to import the data. For example, in your Product Details table, there’s a column named ProductName. So, ensure that your Excel data also has a column with the same name, and that the data type is consistent with what’s already set in Dataverse. If your Product Name column is set to "Text" in Dataverse, make sure the column in your Excel file is also formatted as Text in Power Query. This keeps everything in sync and avoids any hiccups during the import.
It’s like making sure the ingredients match the recipe—you want everything to blend together perfectly when you’re done! 😎With that in mind, go ahead and tweak your data as needed. Once you’re happy with your transformations, you’re ready to load it into Dataverse!
Step 5
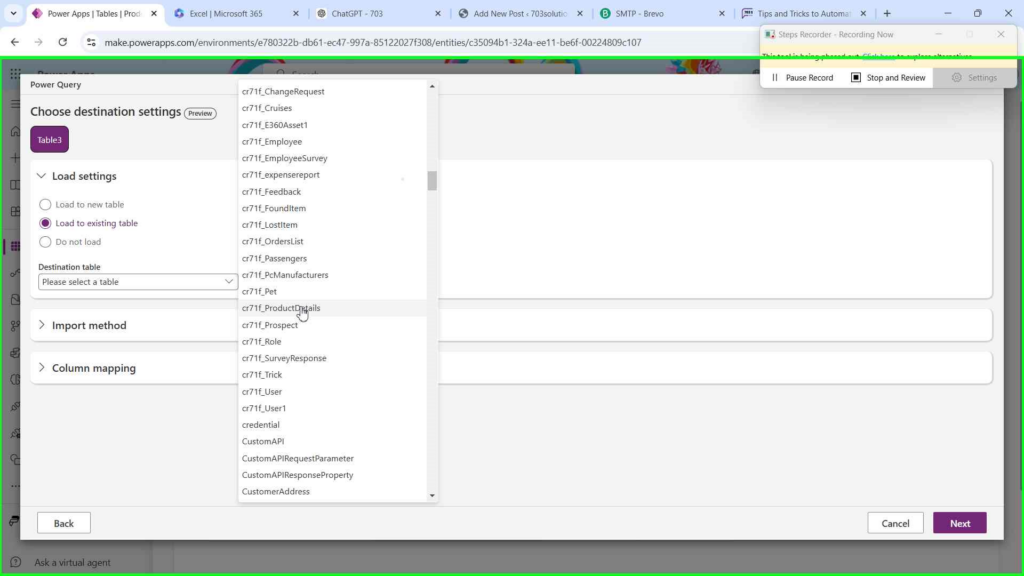
Once you’re happy with your transformations, go ahead and click next to load it into Dataverse, choose your destination, select load to existing table and select your Product Details Table in Dataverse

Step 6
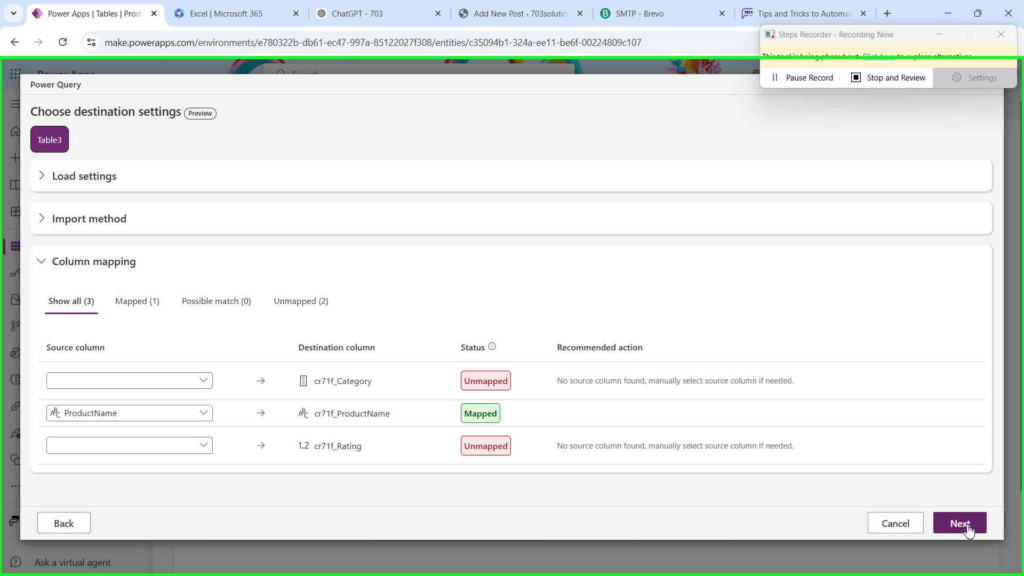
Once you've selected the Dataverse table you'd like to load your data into, it’s time to fine-tune the settings to ensure a smooth import. In the Import Method – Choose Append. This tells Power Query that you want to add the new product data to the existing rows in your Product Details table, rather than replacing anything. It’s like adding fresh toppings to an already awesome pizza. 🍕
In the Column Mapping – Power Query will automatically map the columns between your Excel data and the Product Details table in Dataverse. For example, it will map your ProductName column to the ProductName column in Dataverse. This is where having matching column names and data types comes in handy. If the column names and data types match, Power Query will automatically know where each piece of data should go. No manual adjustments are needed!
It’s like having your ingredients pre-measured and ready to go—everything just fits together perfectly. 😎
This is one of the biggest advantages of making sure your columns and data types align: Power Query does the heavy lifting for you, making the process quicker and less prone to errors. When names and data types match, you avoid potential issues like mismatched fields or data type errors.
Now that everything is mapped out and ready to go, all you need to do is hit Next
Set Your Data Refresh – You’ll be prompted to choose how you want your data to refresh. You can select:
Automatic Refresh – This means Power Query will update the data on its own, based on the schedule you set (e.g., daily, weekly). Perfect for keeping your data up-to-date without lifting a finger! ⏰
Manual Refresh – If you prefer to manually trigger the refresh (say, when you want to update it on your own schedule), go ahead and select this option. You can always refresh the data at any time by clicking a button in Power Query.
Publish Your Changes – Once you've set your refresh options, hit Publish to apply all your changes. This final step will load your newly transformed data into Dataverse, where it will be stored in your Product Details table.
You’ve just automated the process of updating and importing data, saving yourself from endless manual data entry. Now your product list is complete, ready for action, and easily maintainable. High five! 🙌

Conclusion: Power Query Is the Data Whisperer You Didn’t Know You Needed
Power Query is like the superhero of data prep: quiet, powerful, and always coming to the rescue when you need it most. By using Power Query to clean and transform external data before loading it into Dataverse, you can save yourself a ton of time and frustration. Now, go ahead and give your data a makeover. Clean it, transform it, load it, and let your apps reap the rewards. You've unlocked the secret to effortless data import! Happy querying, and may your data always be clean and your transformations seamless! 💪